Report cards, sports certificates, class and team photos, standardized test results, programs from the school play – if you are a parent, what do you do with all those papers? My Look-Back Book is the quick, easy, and inexpensive answer.
As the mother of triplets, I had three elementary age children. I had files set up for everything, but I wanted my children to understand that these were their documents, not mine. Around the year 2000, when my children were ten and in fifth grade, I learned about the My Look-Back Book, and I had the answer!
I attended a parenting workshop called The Me Book during a conference at the University of California, Irvine. I do not remember the name of the speaker, and I cannot find her information on the internet, so I am dedicating this post to her wonderful idea that my family adopted immediately.
Imagine a notebook in each of your children’s rooms that tells their story! They can flip to their grades and see progress. They can flip back to their Little League certificate and photos and see what year they played on the Little League Mudhens. The idea is that they can see their accomplishments. Think ahead to the senior year of high school. Perusing their academic, sports, and volunteer history can assist with those entrance essays and job applications. She called it a Me Book, but I have renamed it My Look-Back Book. I think that is a more descriptive name.
Supplies
It is about a $20 to $30 one-time investment in supplies, but it is definitely worth every penny. I have included links to the products on Amazon. The same products are available at office supply stores.
3” Heavy Duty 3-Ring Notebook “View Binder” – this notebook will be in constant use until the end of high school, maybe even college, so do not scrimp on quality. “View Binder” means you can insert papers in the front, back, and the spine.
8.5” x 11” Sheet Protectors – start with 100 to 200. I have tried some bargain-brands, but they do not move easily from page to page. I prefer the Staples brand, either medium weight or heavy duty.
8-tab Insertable Binder Dividers with Pockets – one set – you can add more sections if needed (see below). The dividers with pockets are made to hold letter-size papers, and so the tabs will show beyond the edge of the sheet protectors. The tabs of typical binder dividers will be hidden by the sheet protectors.
Setting It Up
Let’s get started. Put the 8-tab binder dividers in the front of the notebook, and the sheet protectors in the back of the notebook. That way extras will be handy when needed.
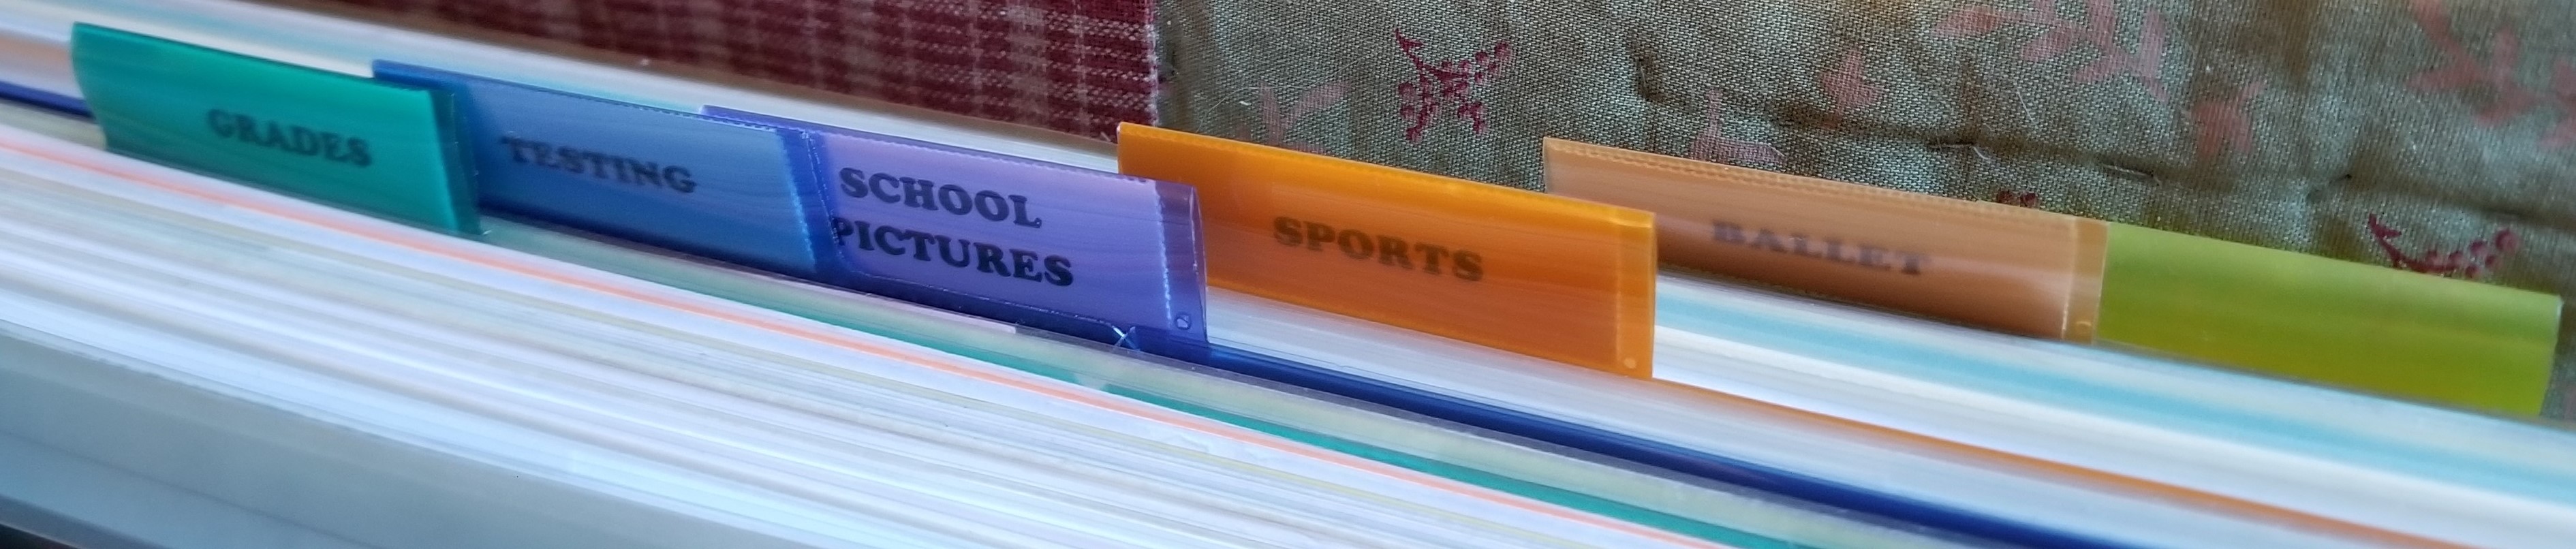
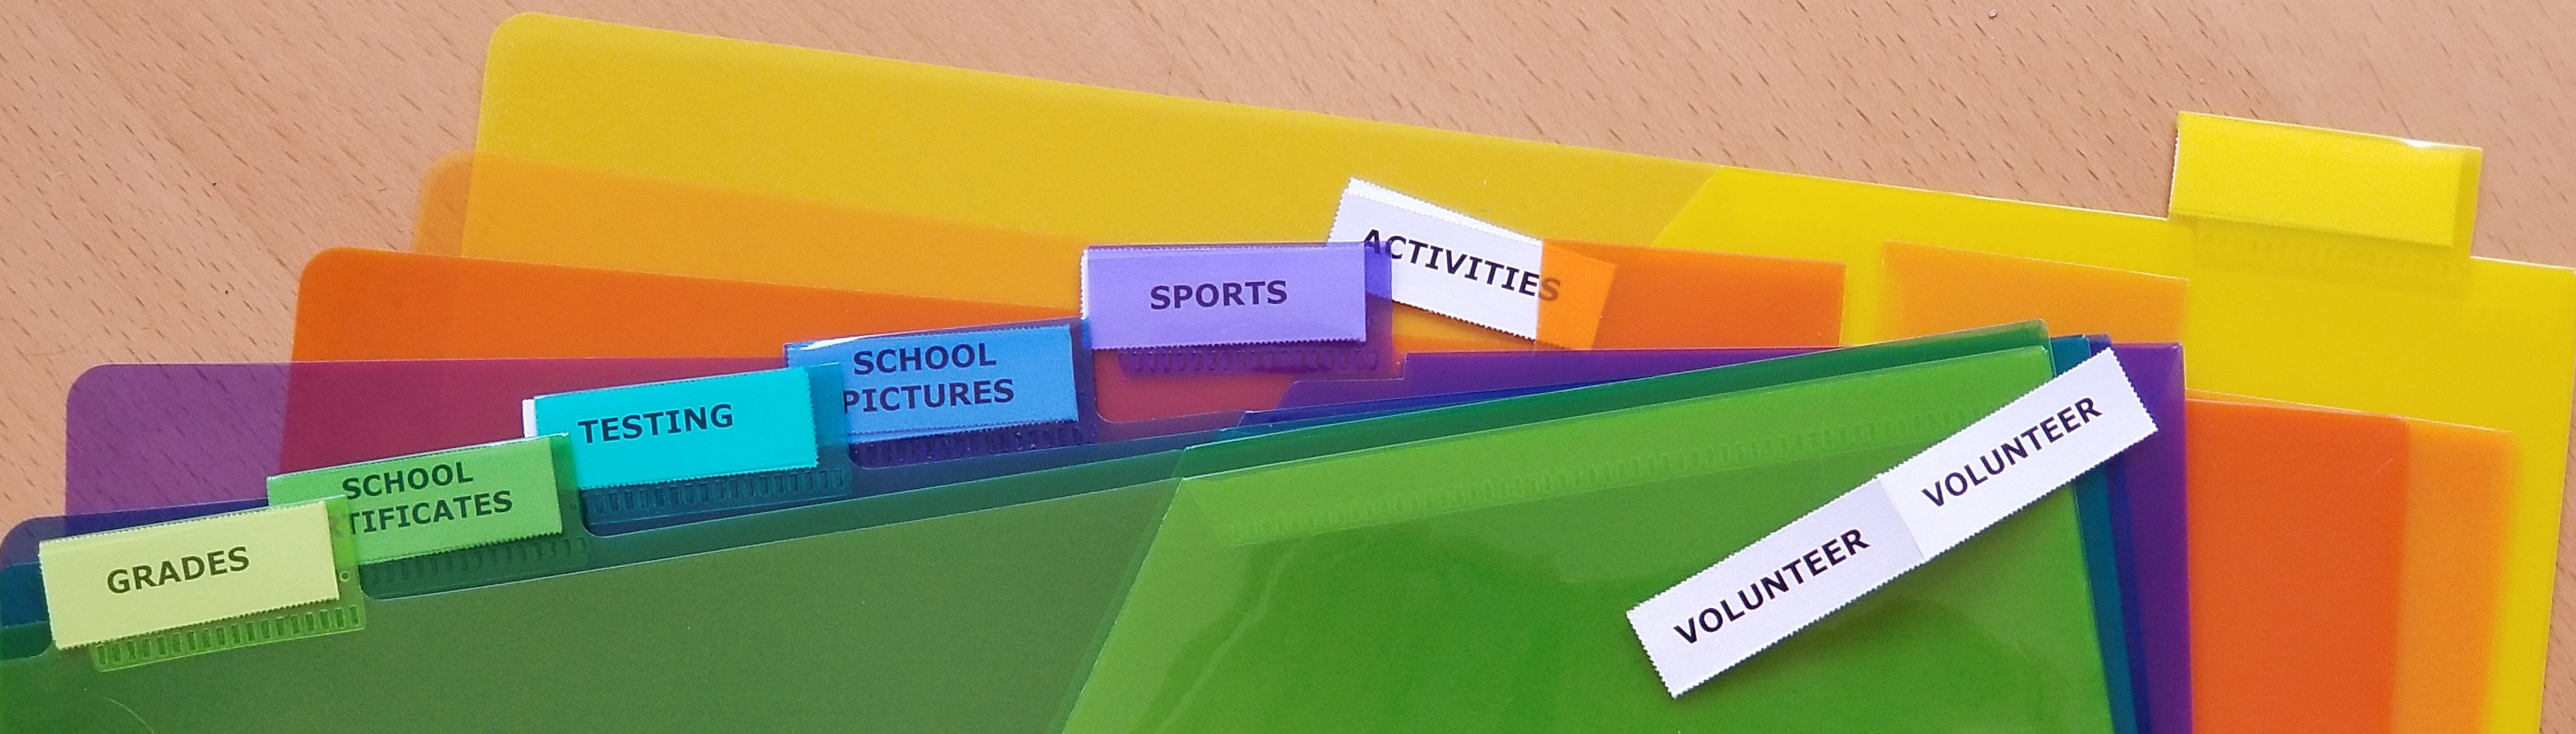
The 8-tab insertable binder dividers come with little cardboard tabs to insert in the dividers, hence, the name, “insertable divider,” right? (I use Avery’s Big Tab template with bold-faced Verdana font, which was created for clarity, in 14-point – or as large as will fit.) You can either print by hand or use your computer to print the inserts. They fold in half when you insert them, so be sure you print on both sides with bold-face lettering. Here are the names of each section, which you may place in any order:
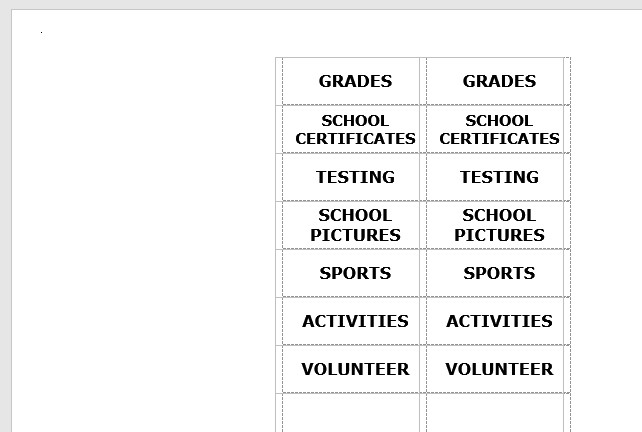
- Grades
- School Certificates
- Testing
- School Pictures
- Sports
- Activities
- Volunteer
- ______________ (blank)
The Sports and Activities and blank tab may be customized for your child? Dance? Scouting? Summer Camp? Whatever you need – leave one blank for now, but be sure to put the Volunteer section in, okay?
Fill Up My Look-Back Book
Some of you may have kindergartners, so you are starting from scratch. Others may be starting in fifth grade like I did. Find all those papers that will now go in the My Look-Back Book, and slide each one into its own sheet protector. Put the most recent documents in front of the older. This is called “reverse chronological order.” For example, take all the report cards, usually one per semester, plus any mid-semester progress reports. To make organizing easier, I put each one in a sheet protector, then sort them with kindergarten in the back, and the current grade in the front. Put them in the notebook behind the tab labeled Grades.
Continue through the other sections, always with the most recent on top. In the sports section, I like to put any purchased individual and team photos with the certificates.
General Instructions
- Always place the most recent on top.
- For “landscape” (or sideways) pages, place the sheet so the bottom is towards the edge of the notebook.
- Putting items back-to-back doubles how much room you have, but it is a hassle if you have to add something later.
- If something is printed on both sides but has to be folded, make a copy or get more than one so you can read everything without removing it whenever possible.
A Word about Photos
Always be sure photos are labeled on the back with a photo-safe pencil. I like to use the Stabilo All Pencil. Write lightly, so it does not make indentations on the photo. List the date by year, month, day (if known), the event, the full name of the people in the photo, and the location. (Read more about photo organization in my upcoming blogs.) I have been going through over 100 years of family photos recently, and it is such a treasure to find any information on the back.
Place the largest school photo on the right, with a class photo (if available) on the left. Include any photos of school activities throughout the year if you’d like.
For your children, you may want to add the school year and grade. Each school year covers fall of one year and continues to the next year, so you could write “1999-2000 3rd Grade, 8-years-old.” Always do your best to guess an actual date. Your estimate today will be better than your estimate in ten years. I often put a question-mark after the date if I am guessing.
For school and team photos, write the date it was actually taken, not three months later when you actually receive the photos. I keep all the extra photos in the My Look-Back Book, you know the extra 5x7s or eight wallet sized photos. (Do not forget to scan them first, so you have a digital copy for personal use.) You can even keep the proofs, if you have some. In years to come, some of the bad photos are comedy treasures!
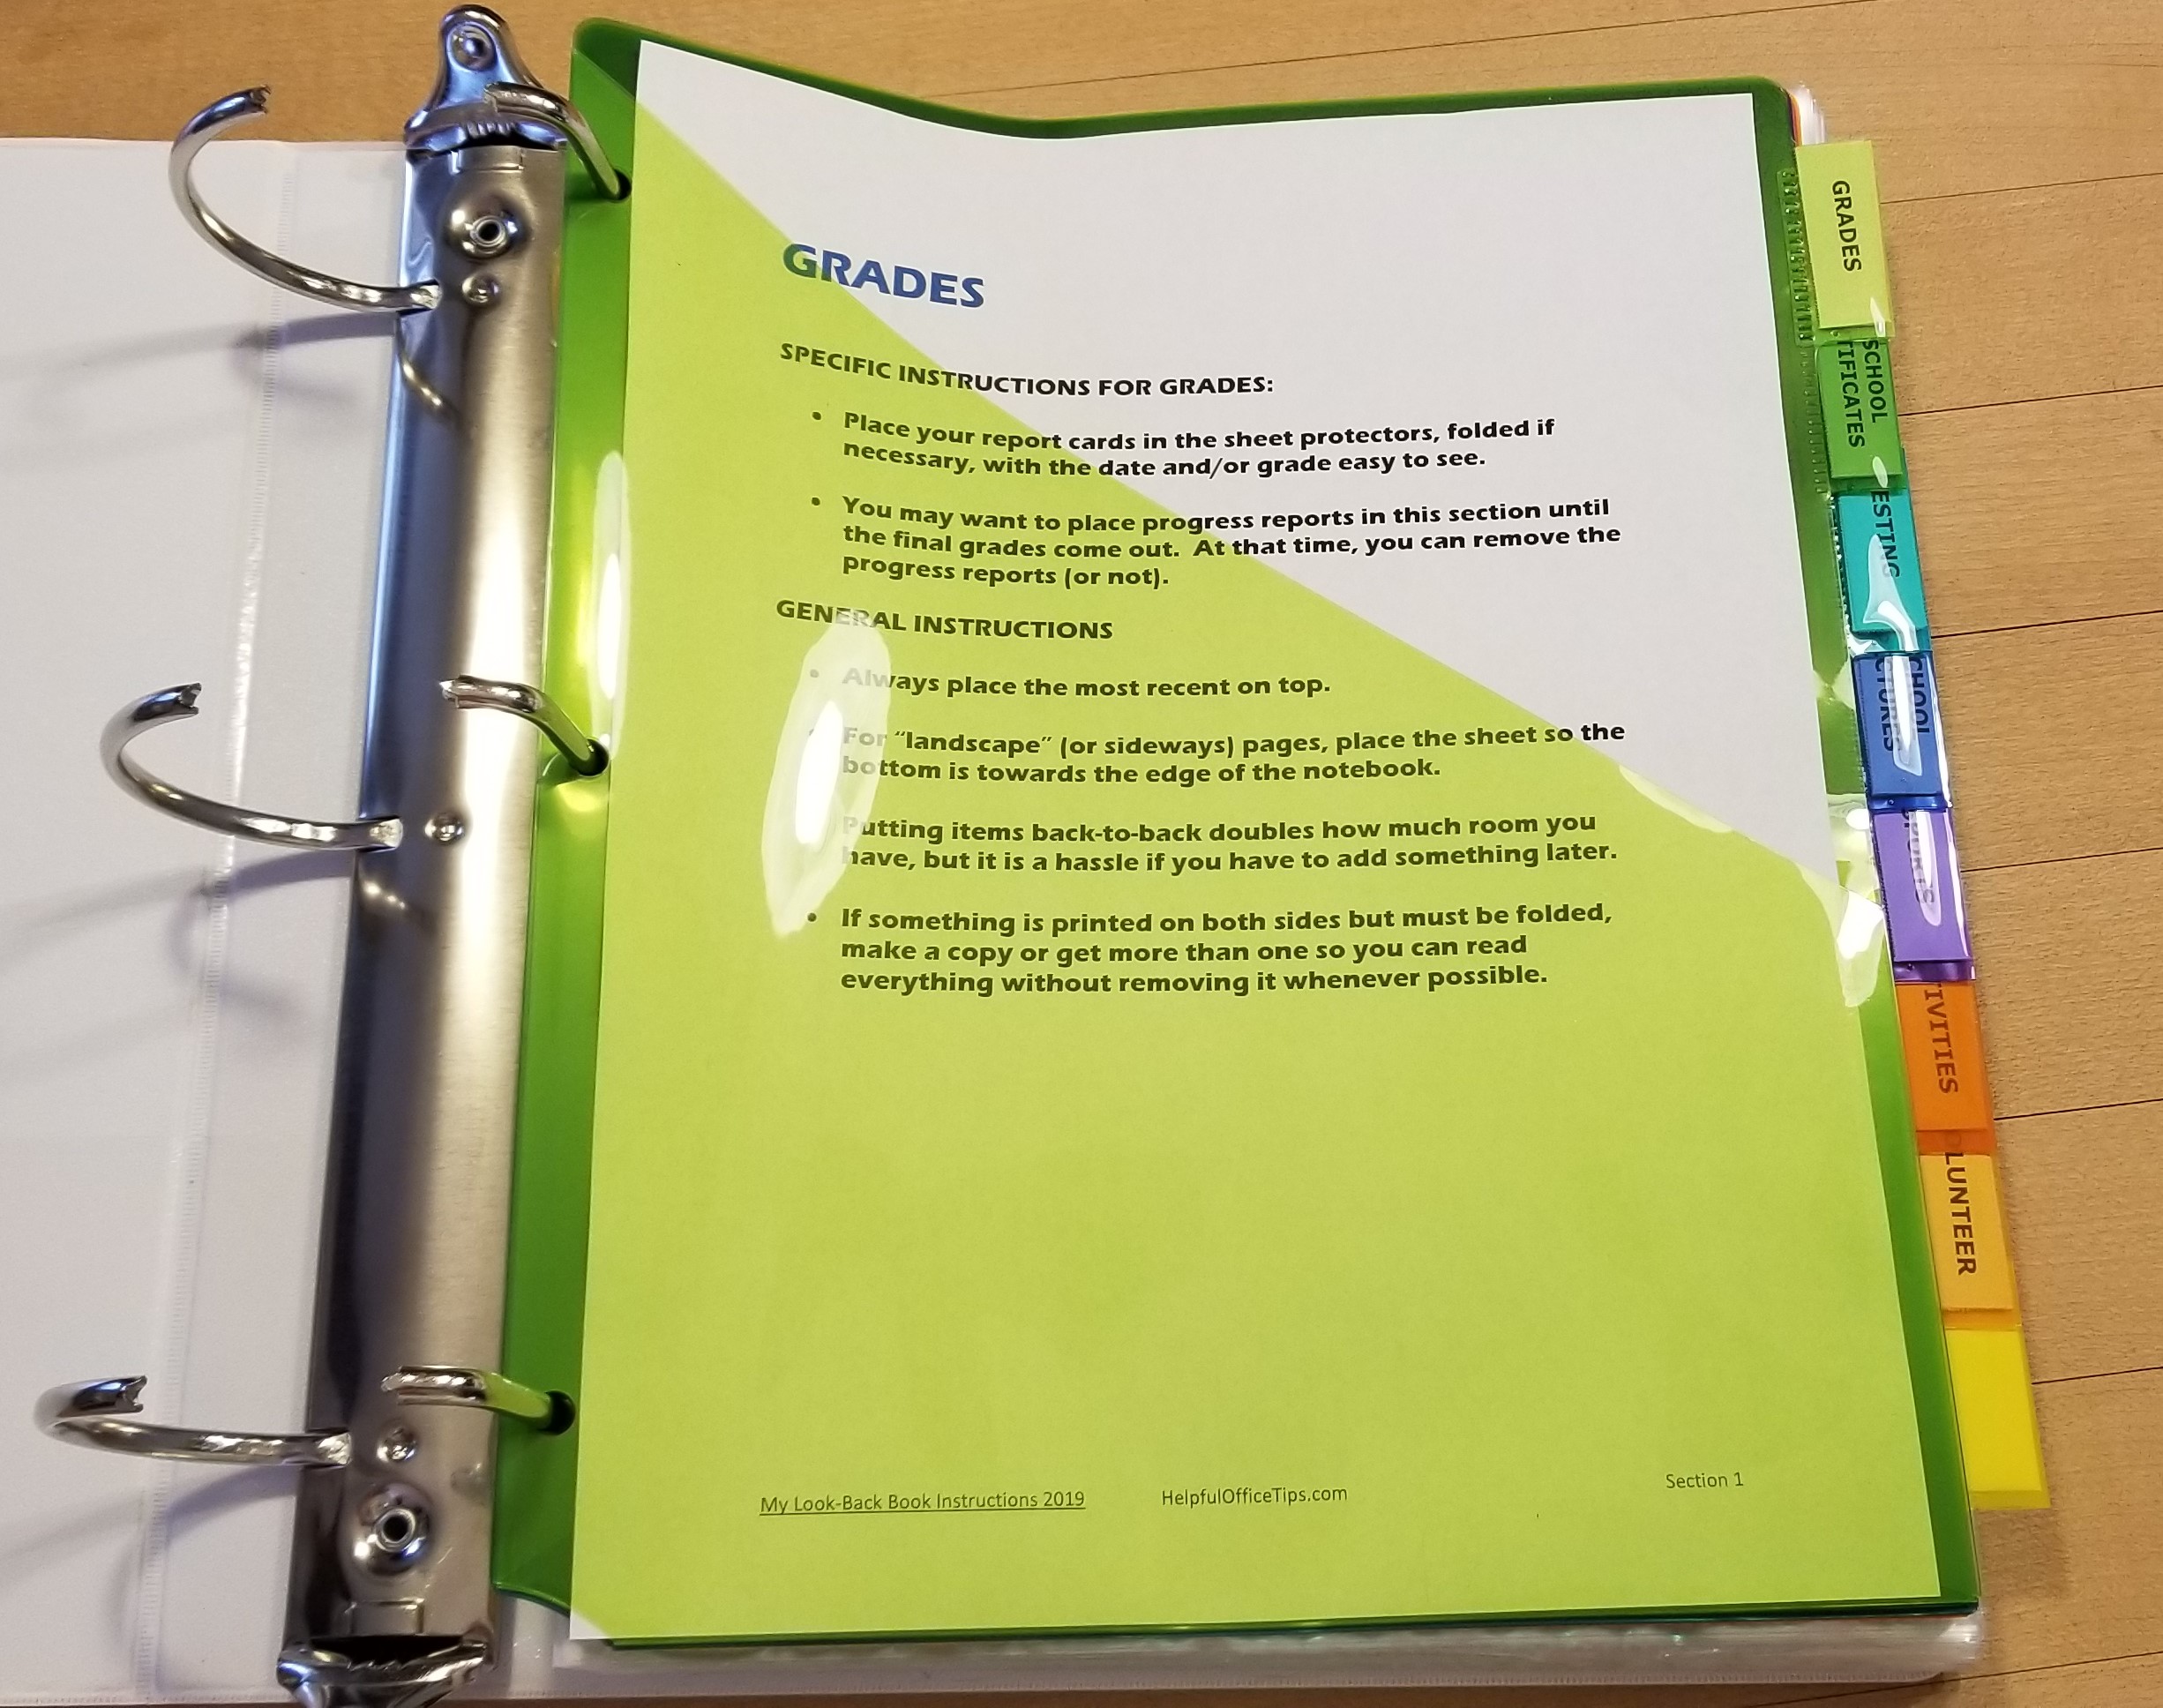
Specific Section Instructions
I have created a PDF for the front of each section to help guide you and your child as they create the My Look-Back Book over the years. I like to keep it in the front pocket of each section. You may print download and print the PDF here:
GRADES
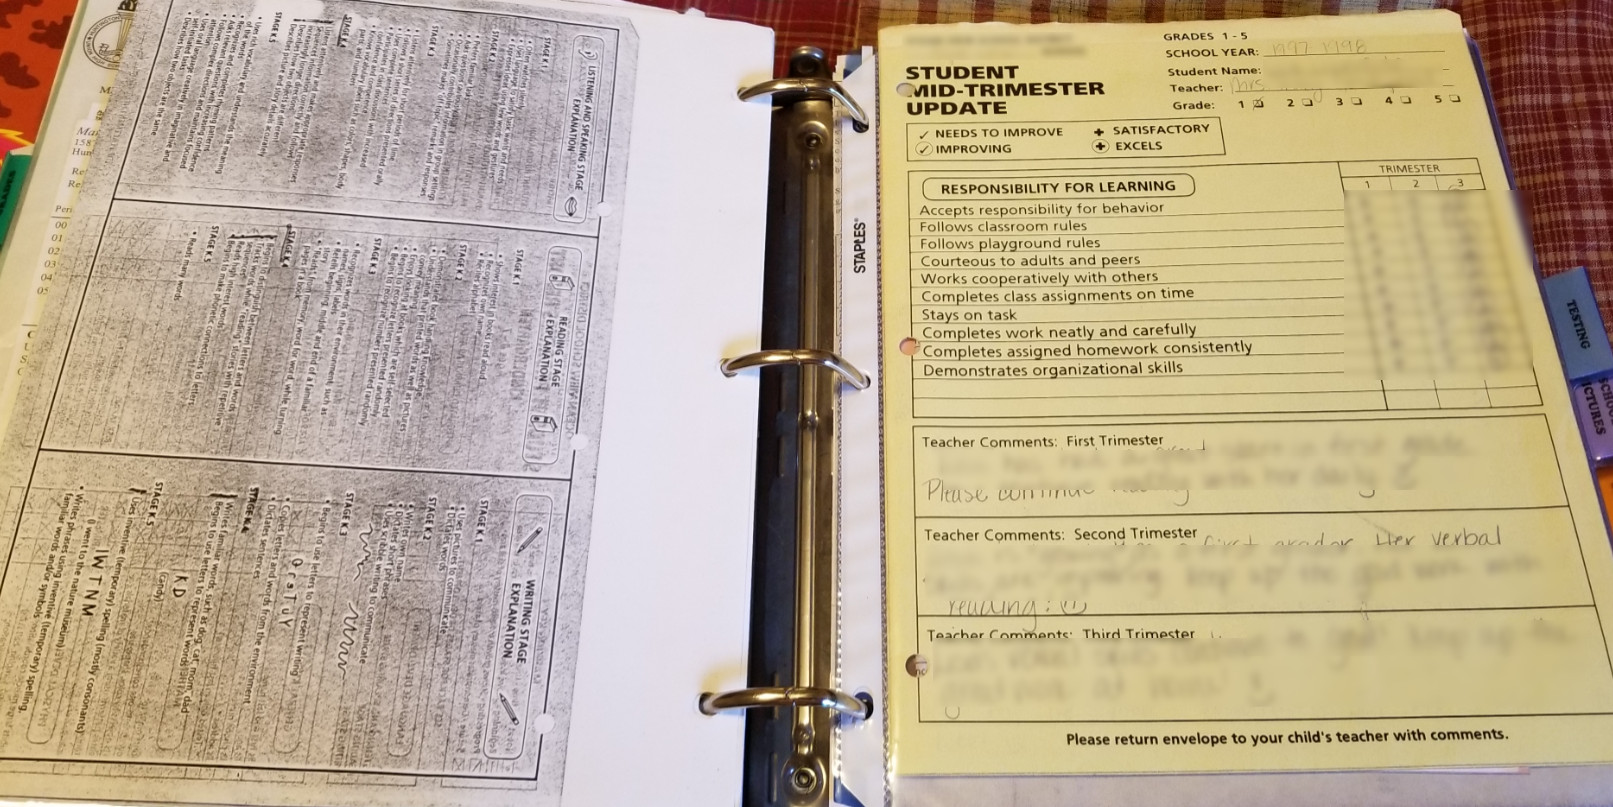
- Place your report cards in the sheet protectors, folded if necessary, with the date and/or grade easy to see.
- You may want to place progress reports in this section until the final grades come out. At that time, you can remove the progress reports (or not).
SCHOOL CERTIFICATES
- Whenever you receive a certificate or special award from school, place it in the sheet protector.
- Insert a handwritten (or typed) note in the back of the sheet protector, facing out, if more details are required.
TESTING
- Add any standardized school testing results.
- In high school, place any college testing results here, such as the PSAT, SAT, or SAT. In the future, these tests with dates and ID numbers may be needed for undergraduate and graduate college applications.
- Advanced Placement (AP) test results should go here.
SCHOOL PICTURES
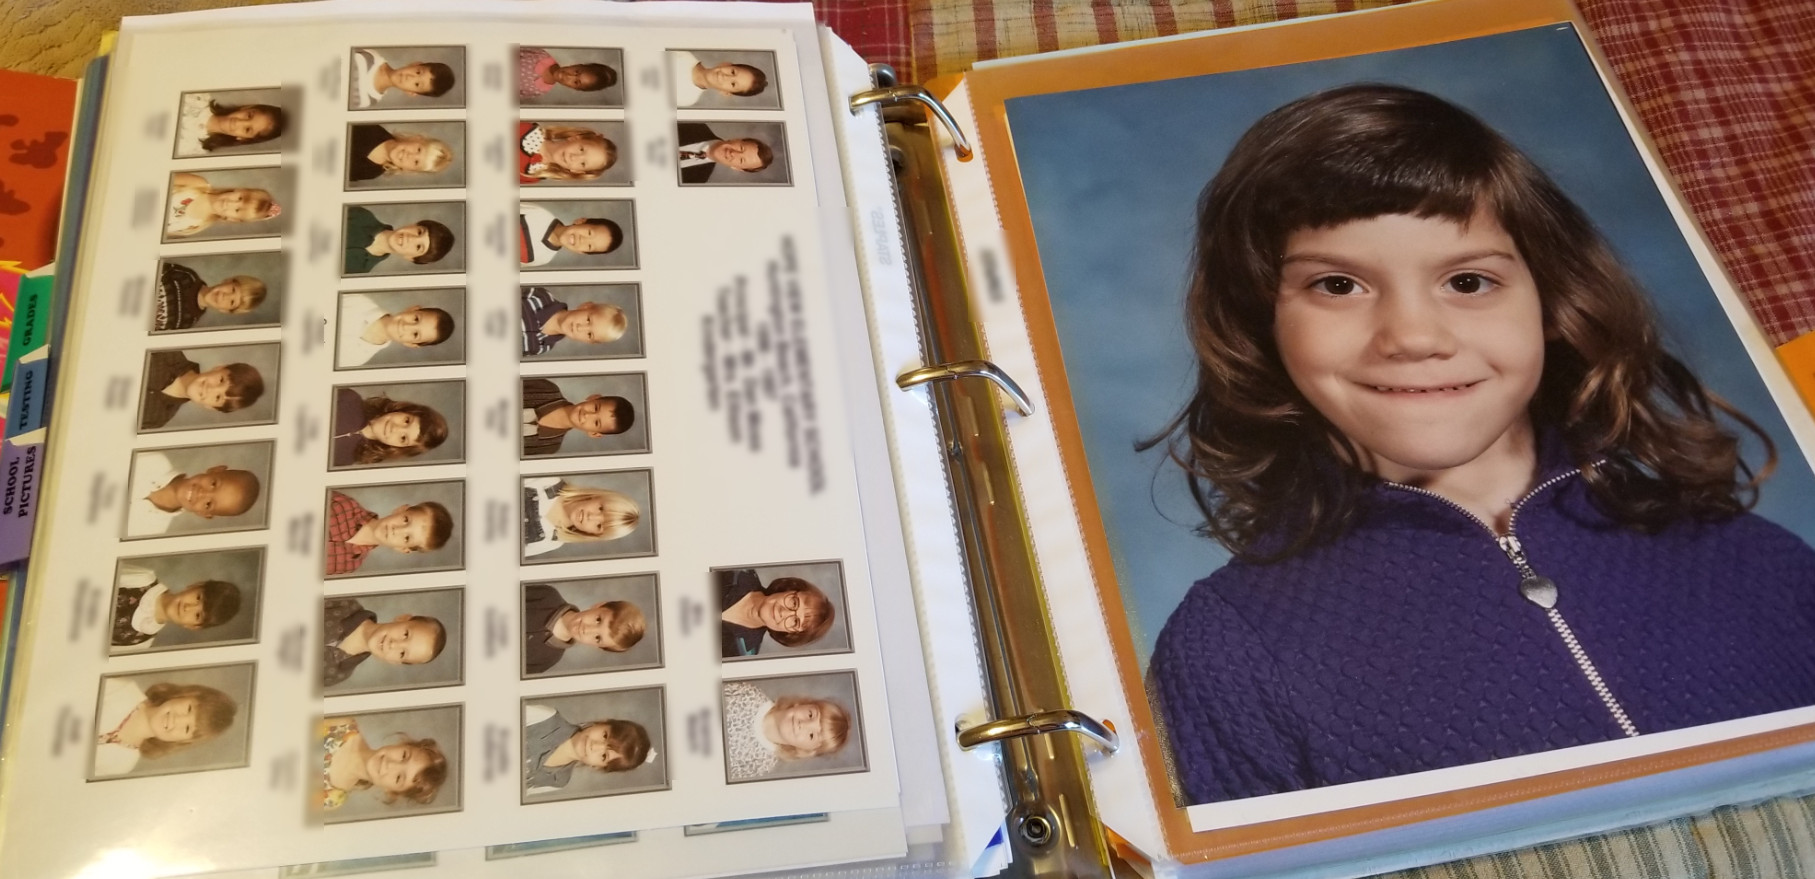
- Place the largest school photo on the right, with a class photo (if available) on the left. Include any photos of school activities throughout the year if you’d like.
- With a photo safe pencil, write the grade and year on the sheet protector, such as “4th Grade” and “2005-2006.” This will help you re-sort if you ever have to remove the photos.
SPORTS
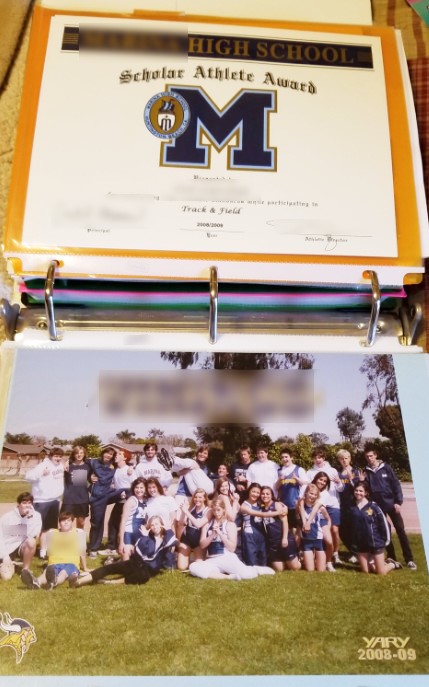
- Place programs, certificates, awards, team photos, buttons, varsity letters, etc., in each sleeve.
- Take a picture of the trophy winner with any trophies and print out a photo to put in the book. Be sure you can read the trophy description and year. Take a close-up of the trophy inscription if needed.
ACTIVITIES
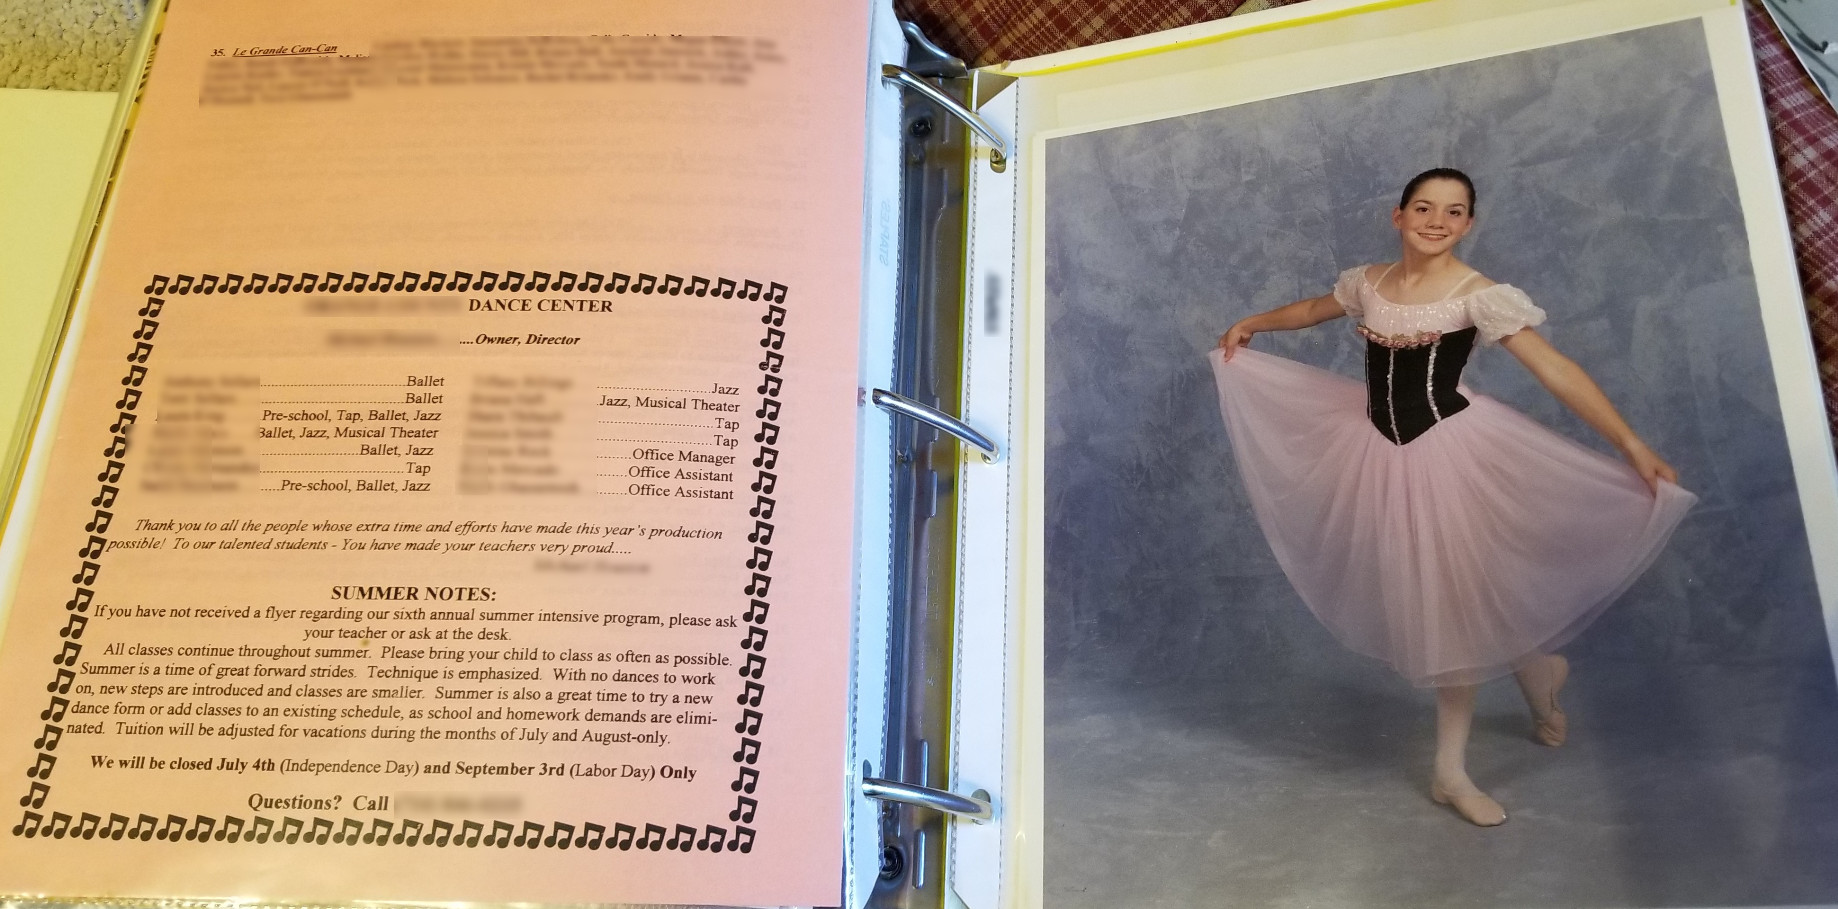
- Place programs, certificates, awards, team or cast photos, in each sleeve.
- Be sure all programs are dated with the year.
VOLUNTEER
- Place certificates, awards, group or organization photos, in each sleeve.
- Make a list in the front of the Volunteer section with this and/or other pertinent information. Use any format that works for you.
| Start Date | End Date | Supervisor and Organization | Organization Address or Location | Duties |
Why Do You Need a Volunteer Section?
The Volunteer section is to keep track of hours your child helped in Vacation Bible School, as an assistant coach at soccer camp, or playing with puppies at the local shelter. If your child does not receive a certificate from the organization, create a log-in sheet for them to emphasize that their assistance was appreciated. If your child notices this section is empty, use it as a teaching moment to talk about the importance of giving time to others. Volunteering is important for building character and a good work ethic. It is a side benefit that college’s see this as an important aspect of their young lives.
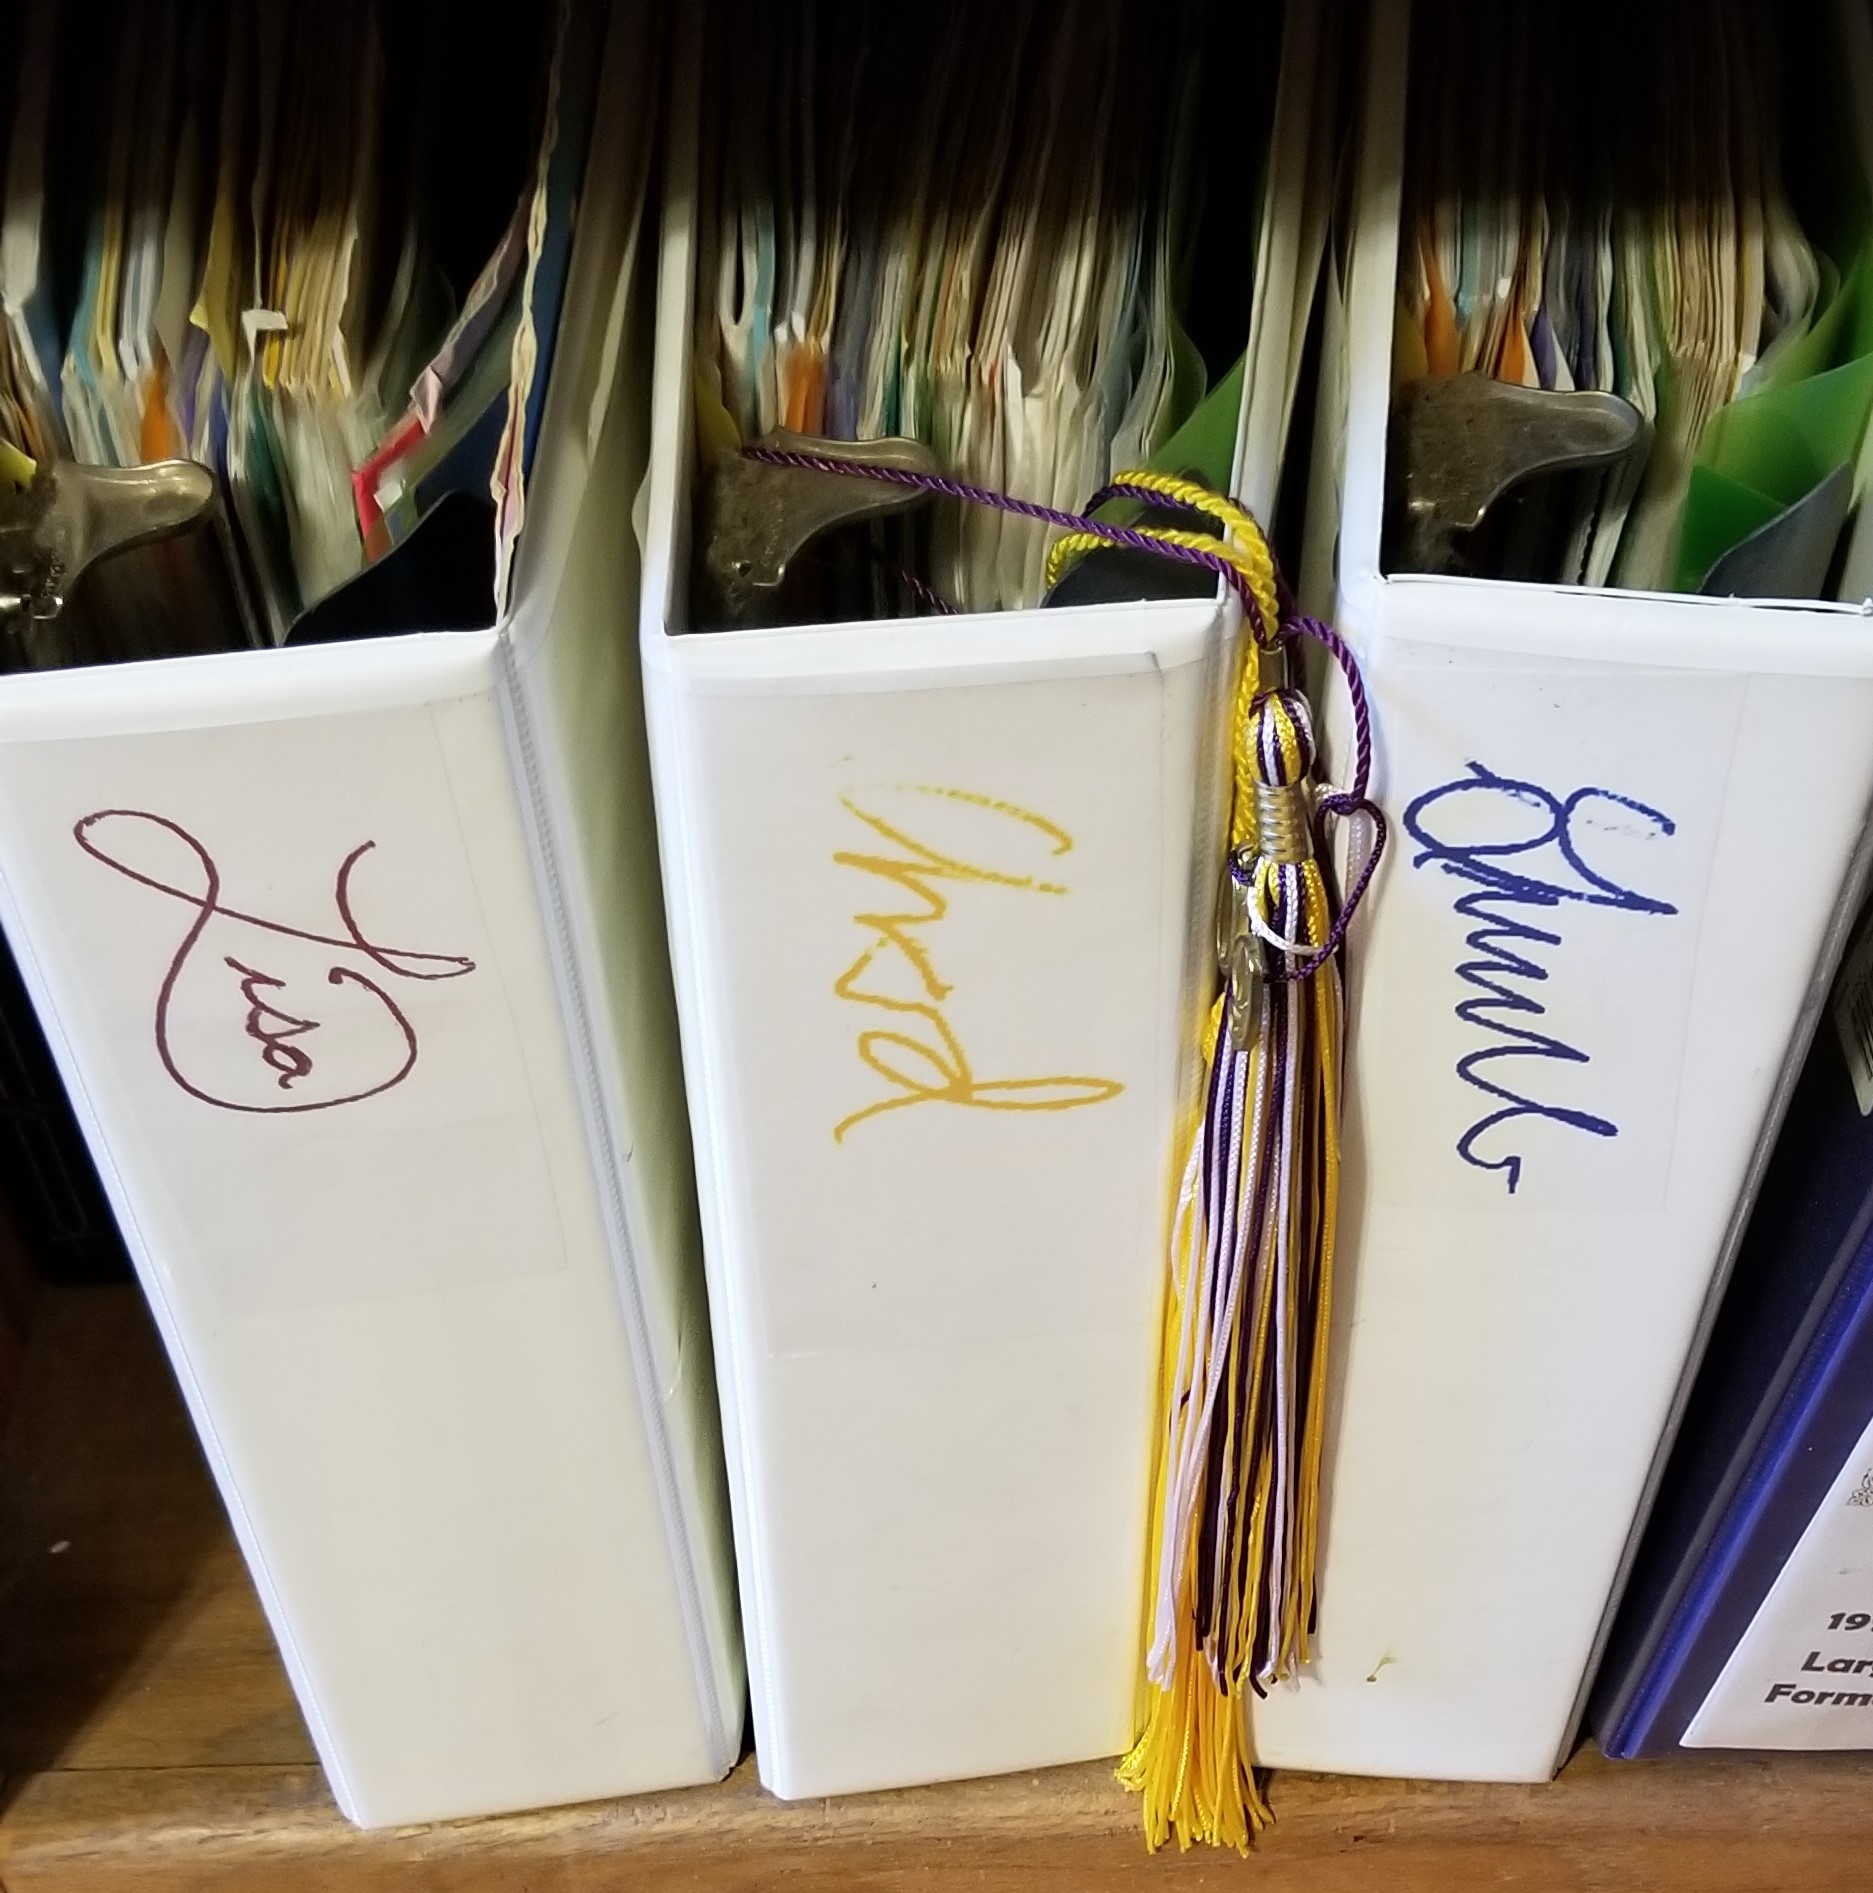
Sign the Spine
Now for the outside of the My Look-Back Book. Cut a piece of white cardstock to fit in the spine or edge. Have your child pick their favorite color of marker and sign his or her first name with a nice big signature! Remember, this My Look-Back Book belongs to your child.
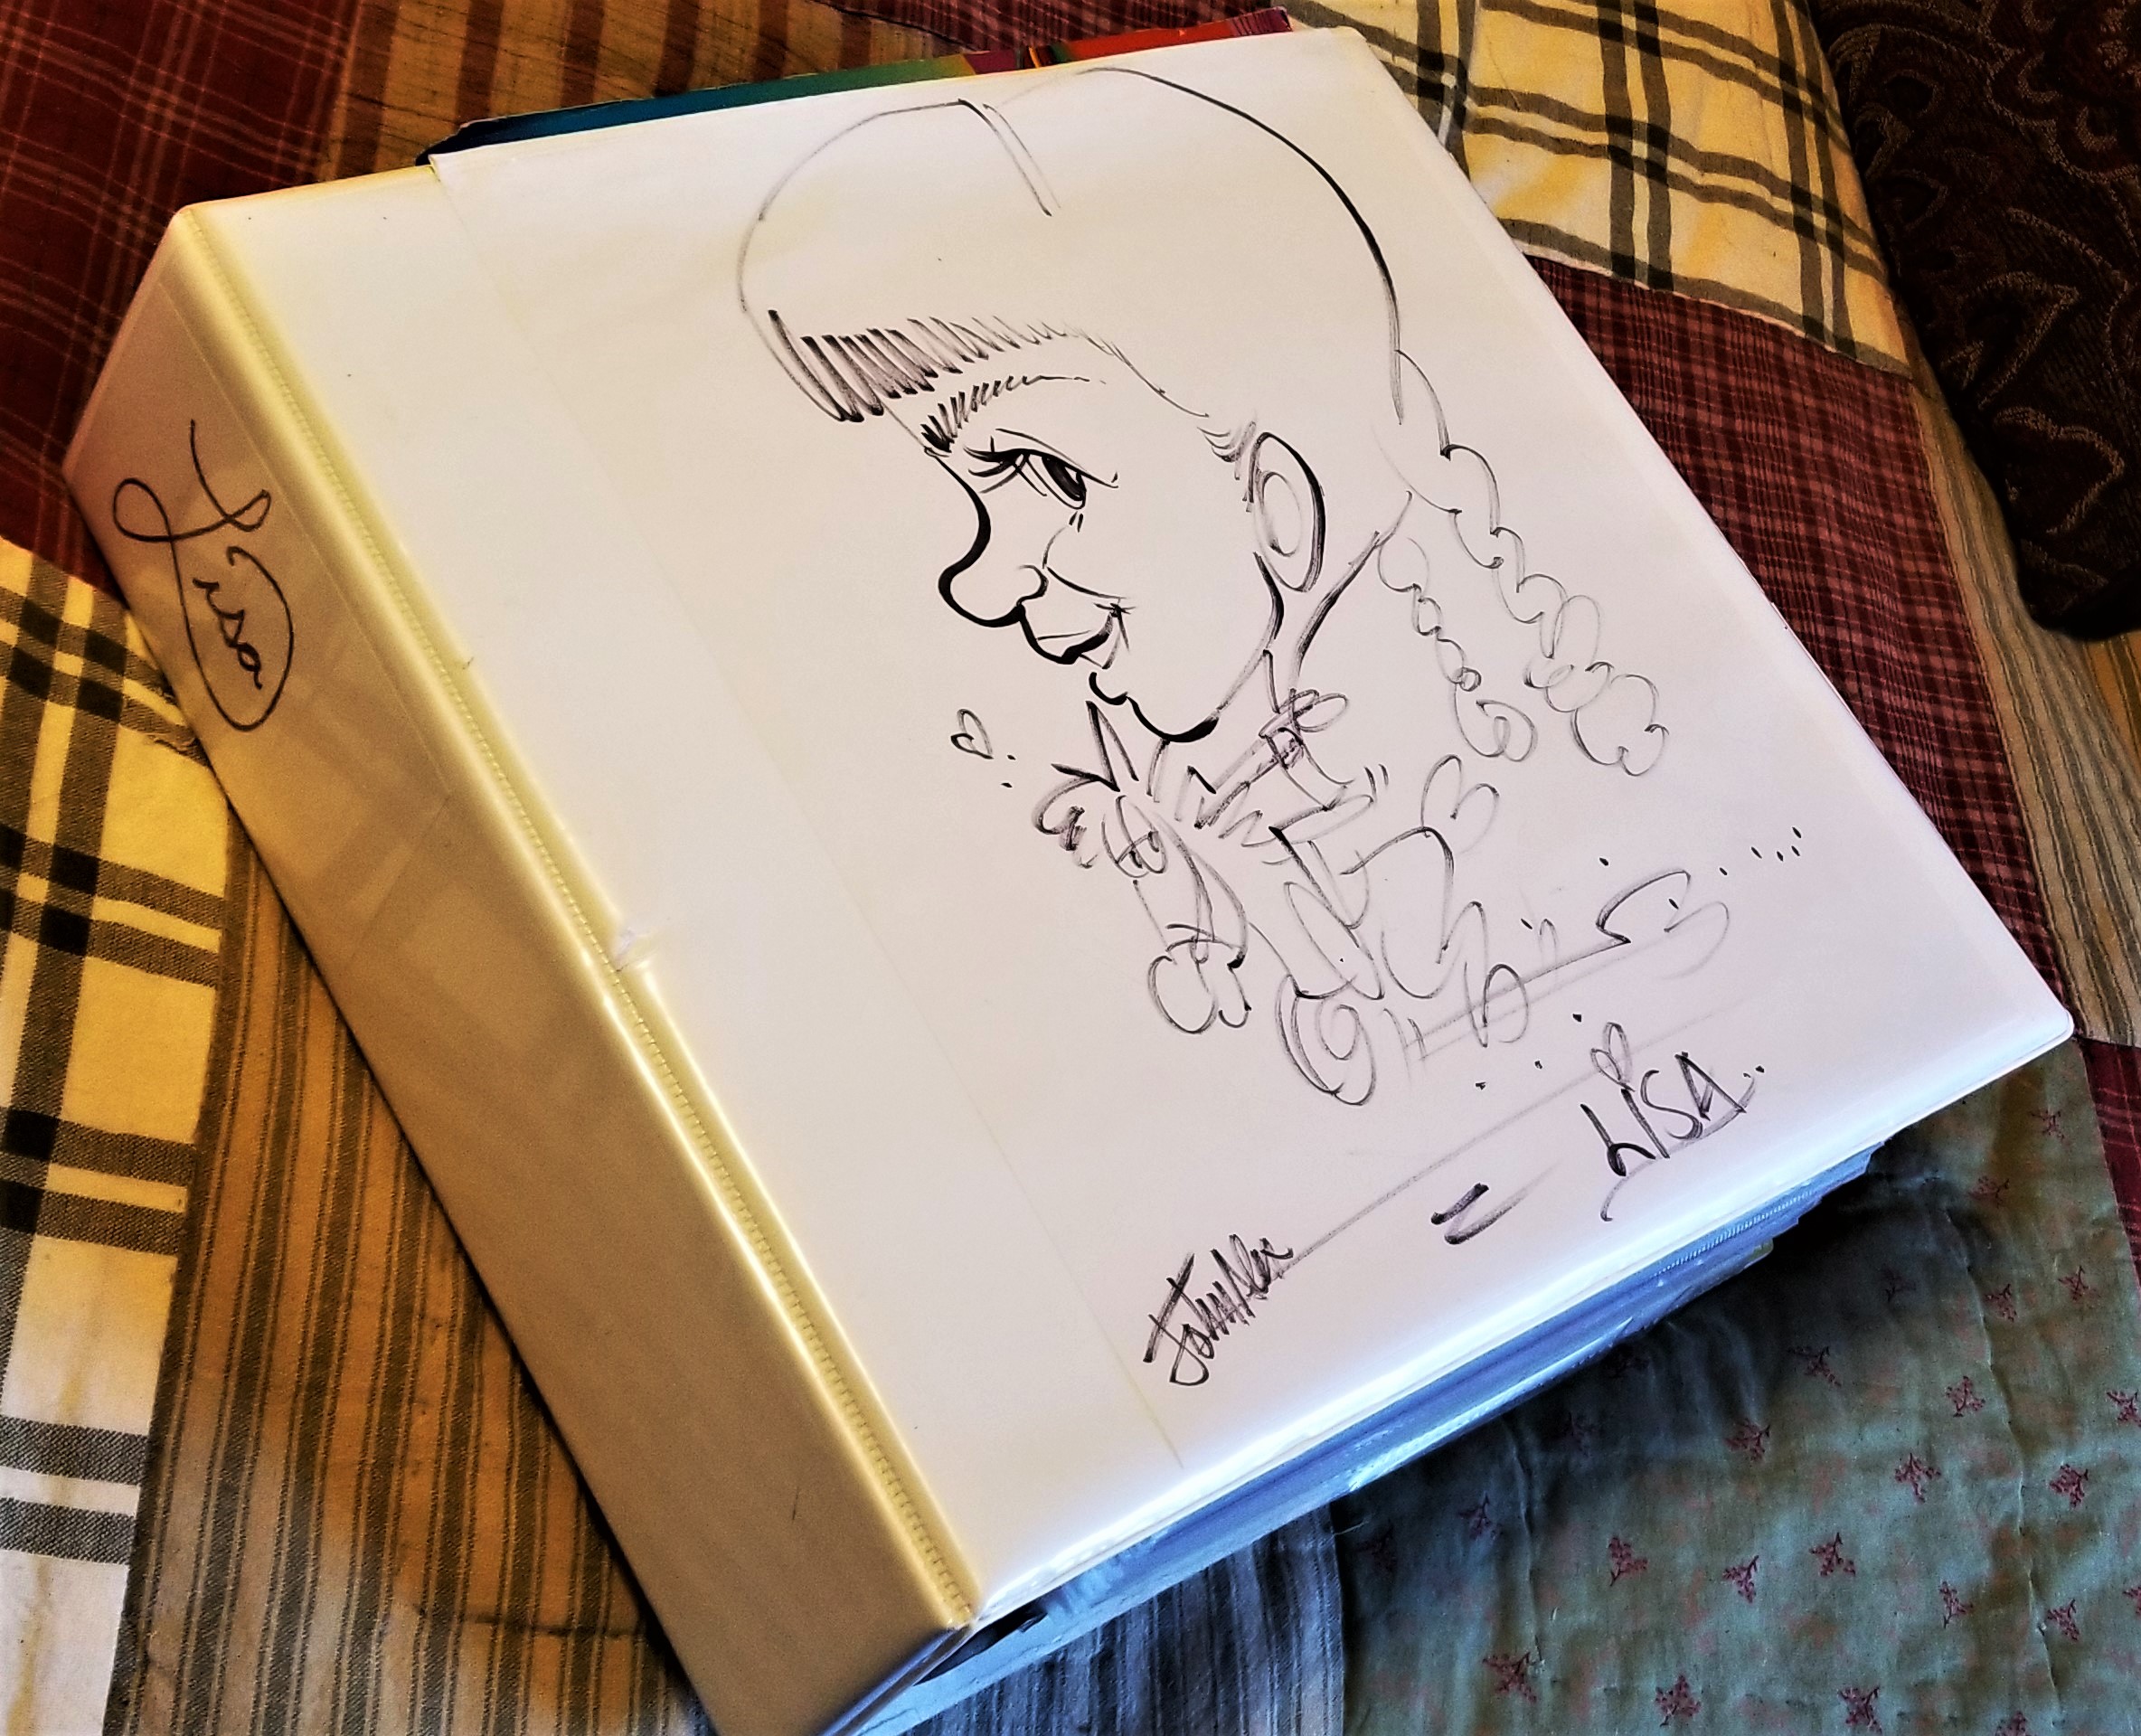
Personalize the Cover
For the front cover, find a cute picture that fits your child’s personality. For my children, a friend was a trained portrait caricaturist. He asked each of my children what they like to do or wanted to be when they grew up. He had drawn a caricature of each child, so I placed them in the front of the notebook. For my grandchildren, we took them to a Arizona’s Raptor Experience, so we had a photo of each with a hawk or owl on their glove. I used those photos when I sent the My Look-Back Books to them. I specifically told them they could change to their own photo or image whenever they wanted, since it was their book!
Back Cover = Resume
Now, what to do with the back cover? This is for a resume, and should probably remain blank until the end of elementary school. Once your children are in 4th or 5th grade, have fun with this. Talk about what they want to be when they grow up. Emphasize that they can change their mind 100-times. That is the fun of being a child – they are imagining their future! There are lots of examples of first-job resumes on the internet. Here are some examples:
- https://resumegenius.com/resume-samples/high-school-resume-example
- https://www.thebalancecareers.com/high-school-resume-examples-and-writing-tips-2063554
- https://resumecompanion.com/resume-examples/high-school-student-resume-sample/
A resume for educational purposes, like college entrance or student jobs, may also be called a Curriculum Vitae (CV). These sites recommend you start with an outline of your accomplishments. What better guide for this outline than the My Look-Back Book? Show your child a few different formats and help them fill in the blanks. Include their favorite subjects, their skills, their Scouting rank, team position, whatever is important to your child. Print out the resume and slide it into the back cover of the My Look-Back Book.
Voila – My Look-Back Book is Ready
Your My Look-Back Book is complete… for now! Store it on a bookshelf in your child’s room. Update it whenever a report card or certificate comes home. Remember, this is your child’s notebook. I help them file the papers, but they can illustrate it or add notes if they want – my daughter did, but my sons did not.
At the end of each school year, look over the resume. Summer is a great time to add some volunteer experience for the middle-schooler and high-schooler. I should mention that it is the parents’ job to stress the importance of giving back to the community, but it is not your job to force them to volunteer. Let the choice be your child’s.
Senior Year and Beyond
In the fall of the senior year, when your child says, “I do not know what to put in my college essay,” calmly suggest he or she spends an evening looking through all their accomplishments in the My Look-Back Book. That should build confidence and help them brainstorm.
The last items we filed were the high school diplomas. Our three My Look-Back Books are tucked away on the family photo shelf. When my adult children come to stay for a holiday, sometimes I notice the My Look-Back Books have been removed and replaced on the shelf.
